Installation and Config
Step 1: Install the Breezz Package
Install the Breezz package directly from the Salesforce AppExchange for System Administrators only.
Step 2: Assign Permissions
To properly configure the package, you must assign the Breezz Admin Permission Set to your user account which will be added by package.
Step 3: Configure the Breezz Plugin
The Breezz framework offers multiple interfaces and virtual classes that can be implemented or extended. However, because Salesforce Managed Packages cannot natively recognize public classes across different namespaces, a Breezz Plugin class must be introduced. This enables Breezz to dynamically create instances of public classes within the subscriber’s organization.
You can achieve this in one of two ways:
- Automated generation: Generate the class automatically using the Breezz UI (Recommended).
- Manual creation: Create the class directly within your Salesforce organization.
Option 1: Via the UI
- Open the Breezz app from the App Launcher.
- Navigate to the Breezz Setup tab.
- Select the General Setup option.
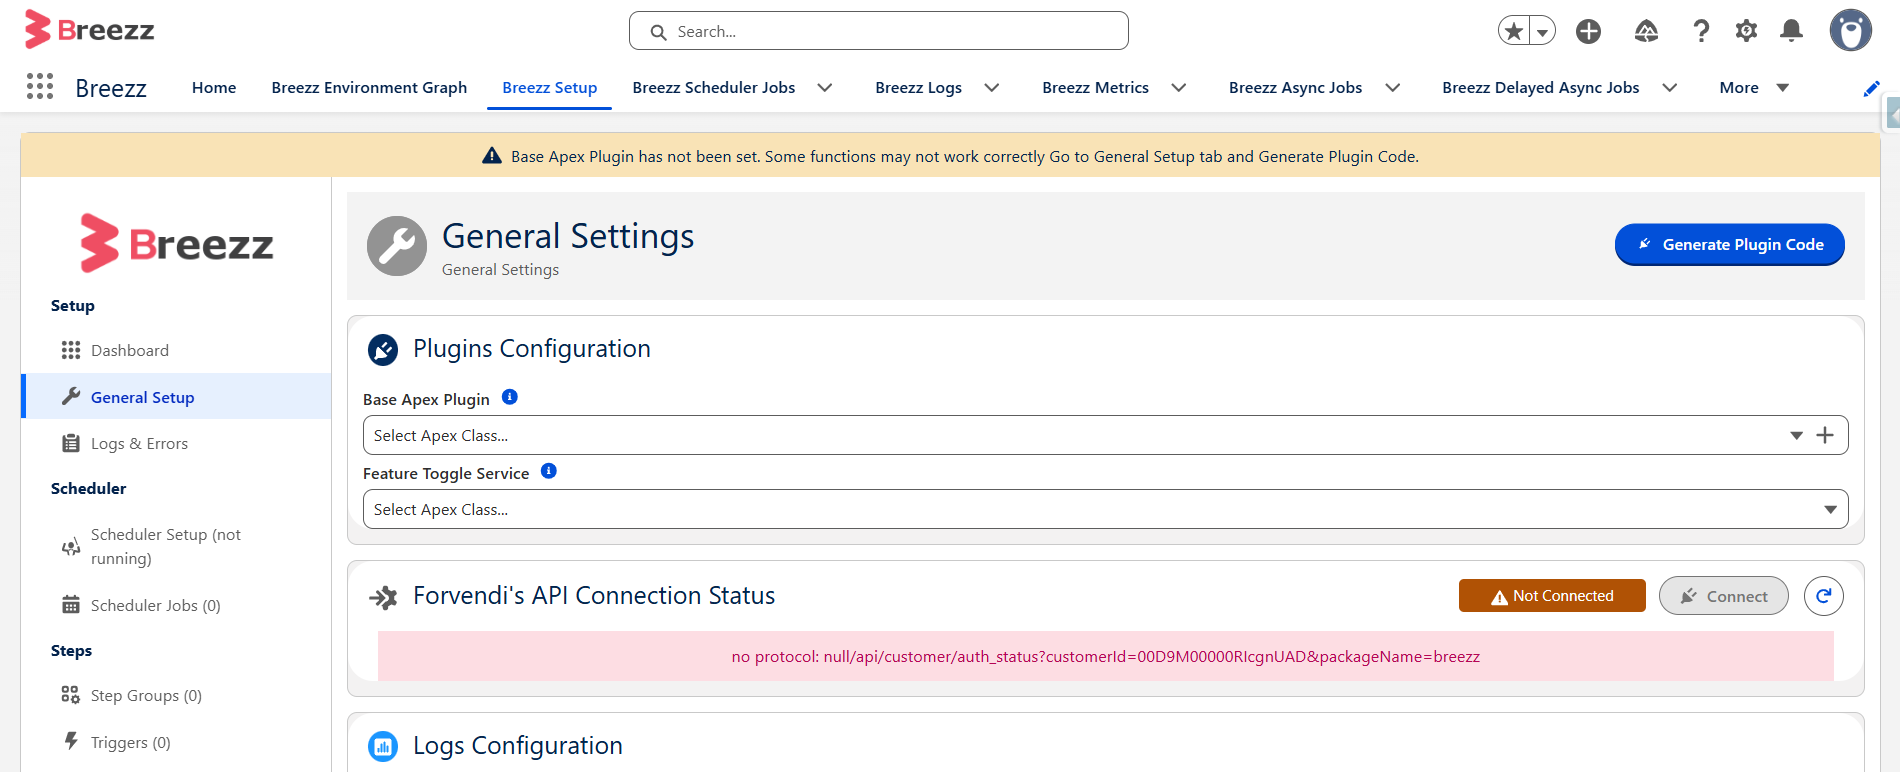
- Click the Generate Plugin Code button.
- Click the field below the class name and select Base Apex Plugin.
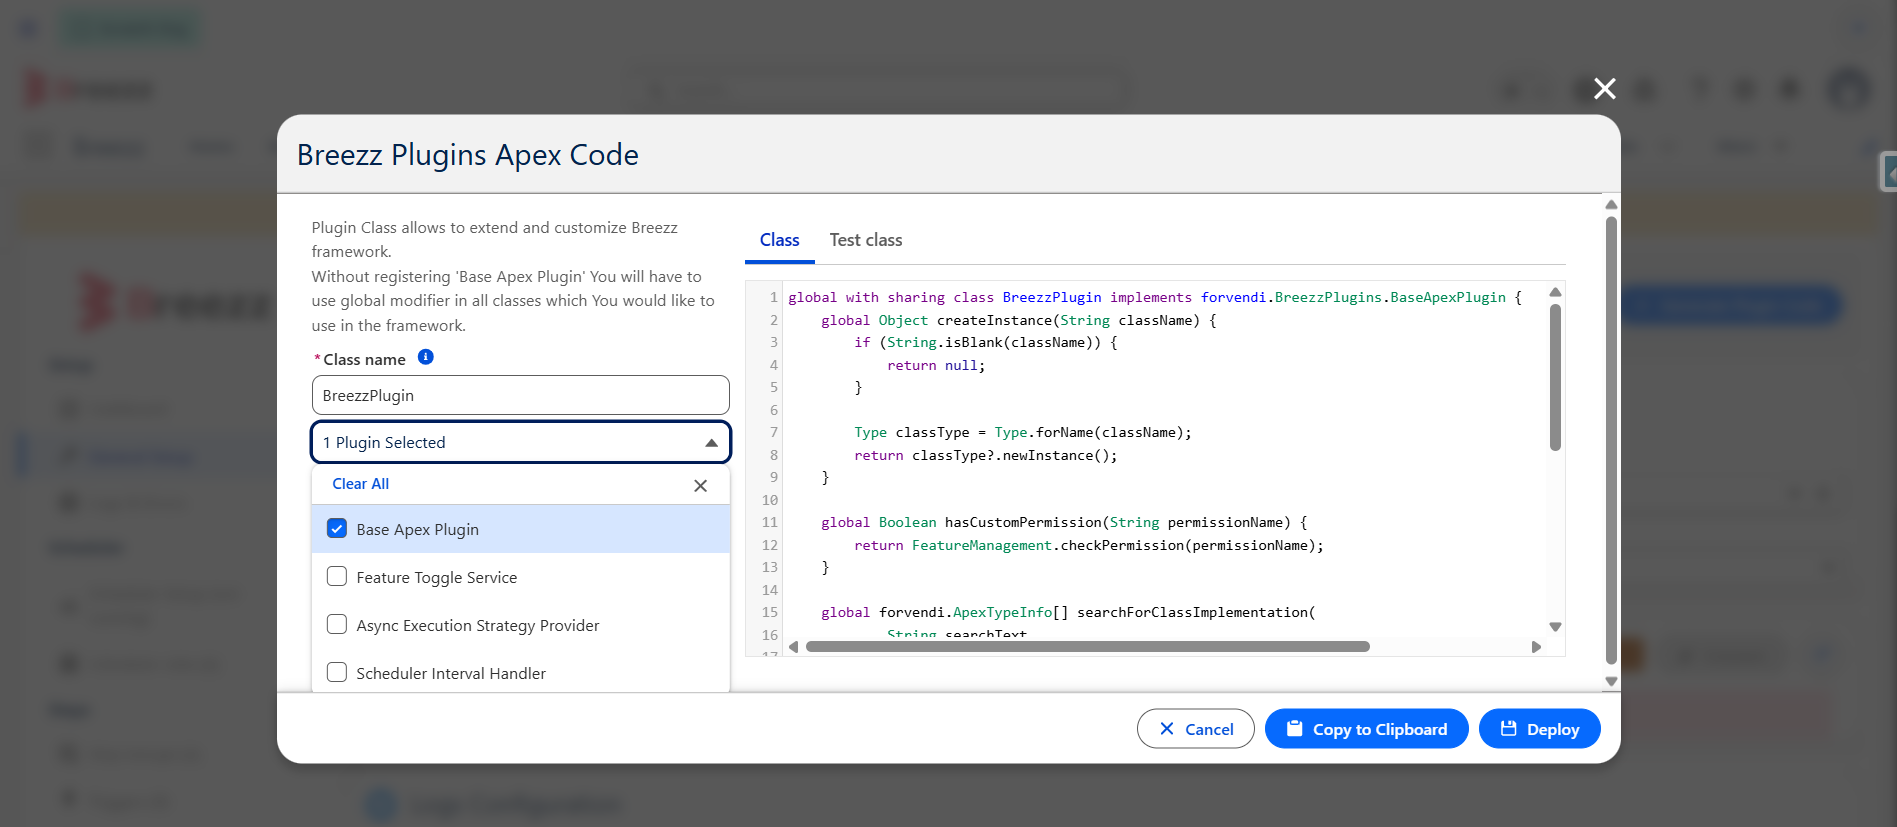
- Confirm the operation by clicking Deploy.
Step 4: Enable the Breezz Scheduler
The Breezz Scheduler is used to execute scheduled jobs at configurable time intervals and to handle internal processes, such as calculating platform health metrics.
You can start the Breezz Scheduler in two ways: via the UI or manually using Apex.
Option 1: Via the UI
- Open the Breezz app from the App Launcher.
- Navigate to the Breezz Setup tab.
- Select the Scheduler Setup option.
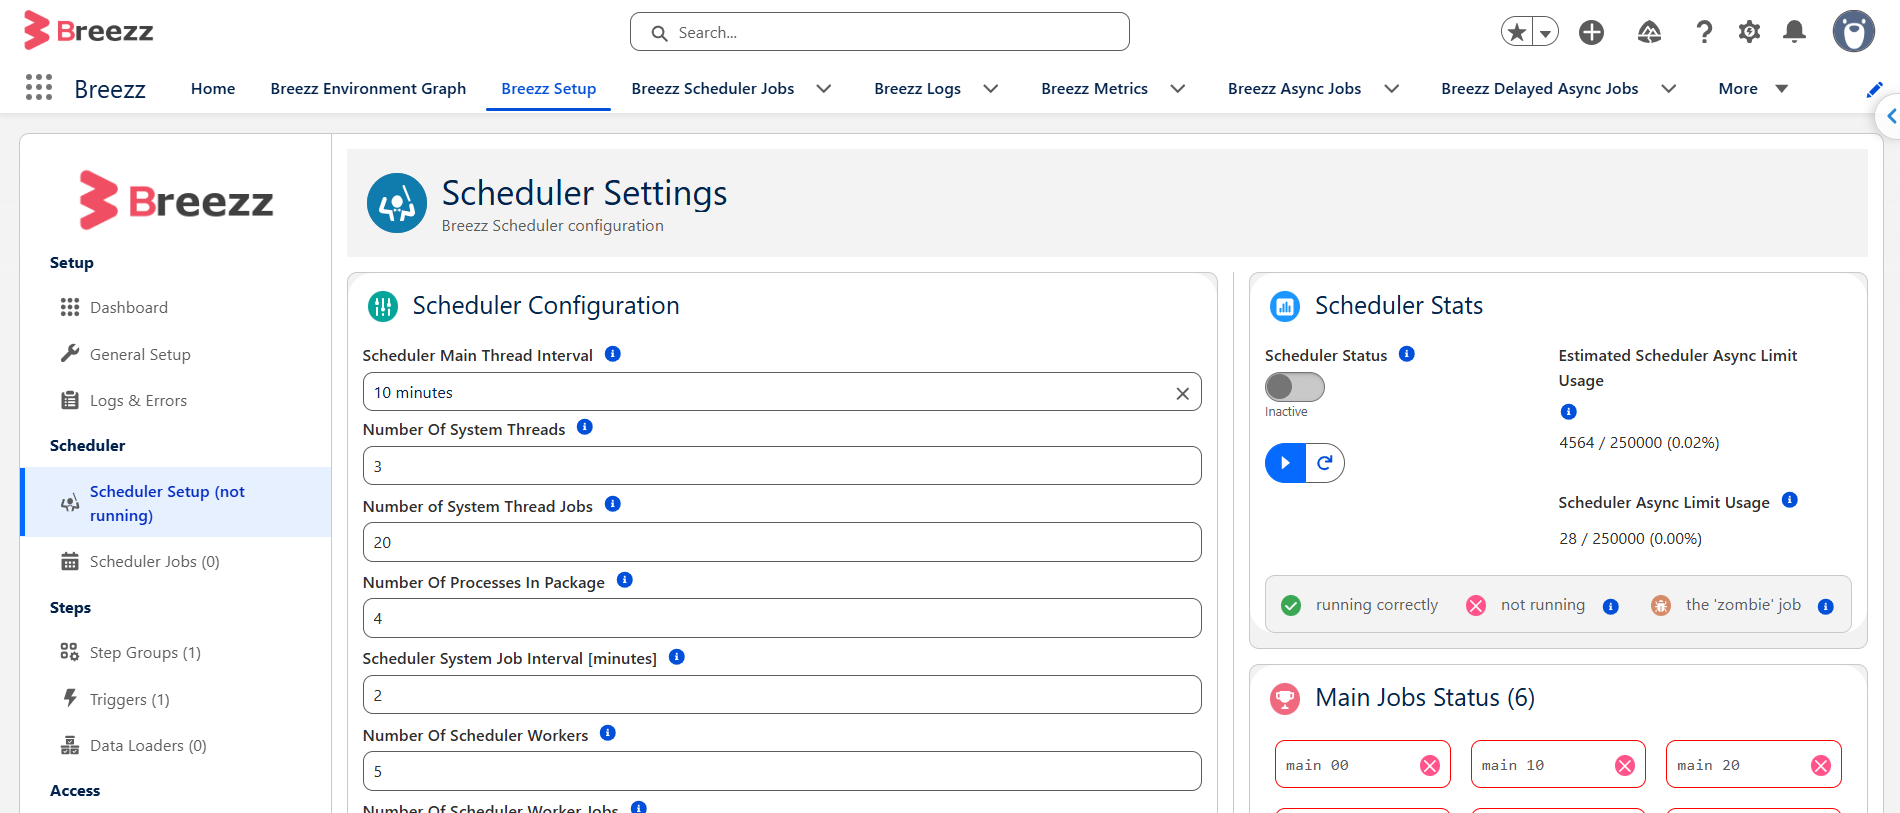
- Under Scheduler Status, click the Start Scheduler button.
Option 2: Manually via Apex
- Click the Setup (gear icon) and open the Developer Console.
- Open the Debug menu and select Open Execute Anonymous Window (or press
Ctrl + E). - Paste and run the following code:
forvendi.BreezzApi.SCHEDULER.run();How it works: The code above generates Breezz Scheduler Job records based on the active Breezz Scheduler Config and Breezz Metric Config. Any changes made to Scheduler Jobs or Breezz Metrics are automatically applied every 10 minutes.
To immediately force job recreation, run one of the following Apex scripts (ensure you execute this as a System Administrator):
forvendi.BreezzApi.SCHEDULER.kill();
forvendi.BreezzApi.SCHEDULER.run();
Or simply use the shorthand:
forvendi.BreezzApi.SCHEDULER.rerun();Step 5: Allow Metadata Deployment
Note: This step is required only when installing non-certified or unvalidated package versions.
To enable metadata deployment via Apex, follow these steps:
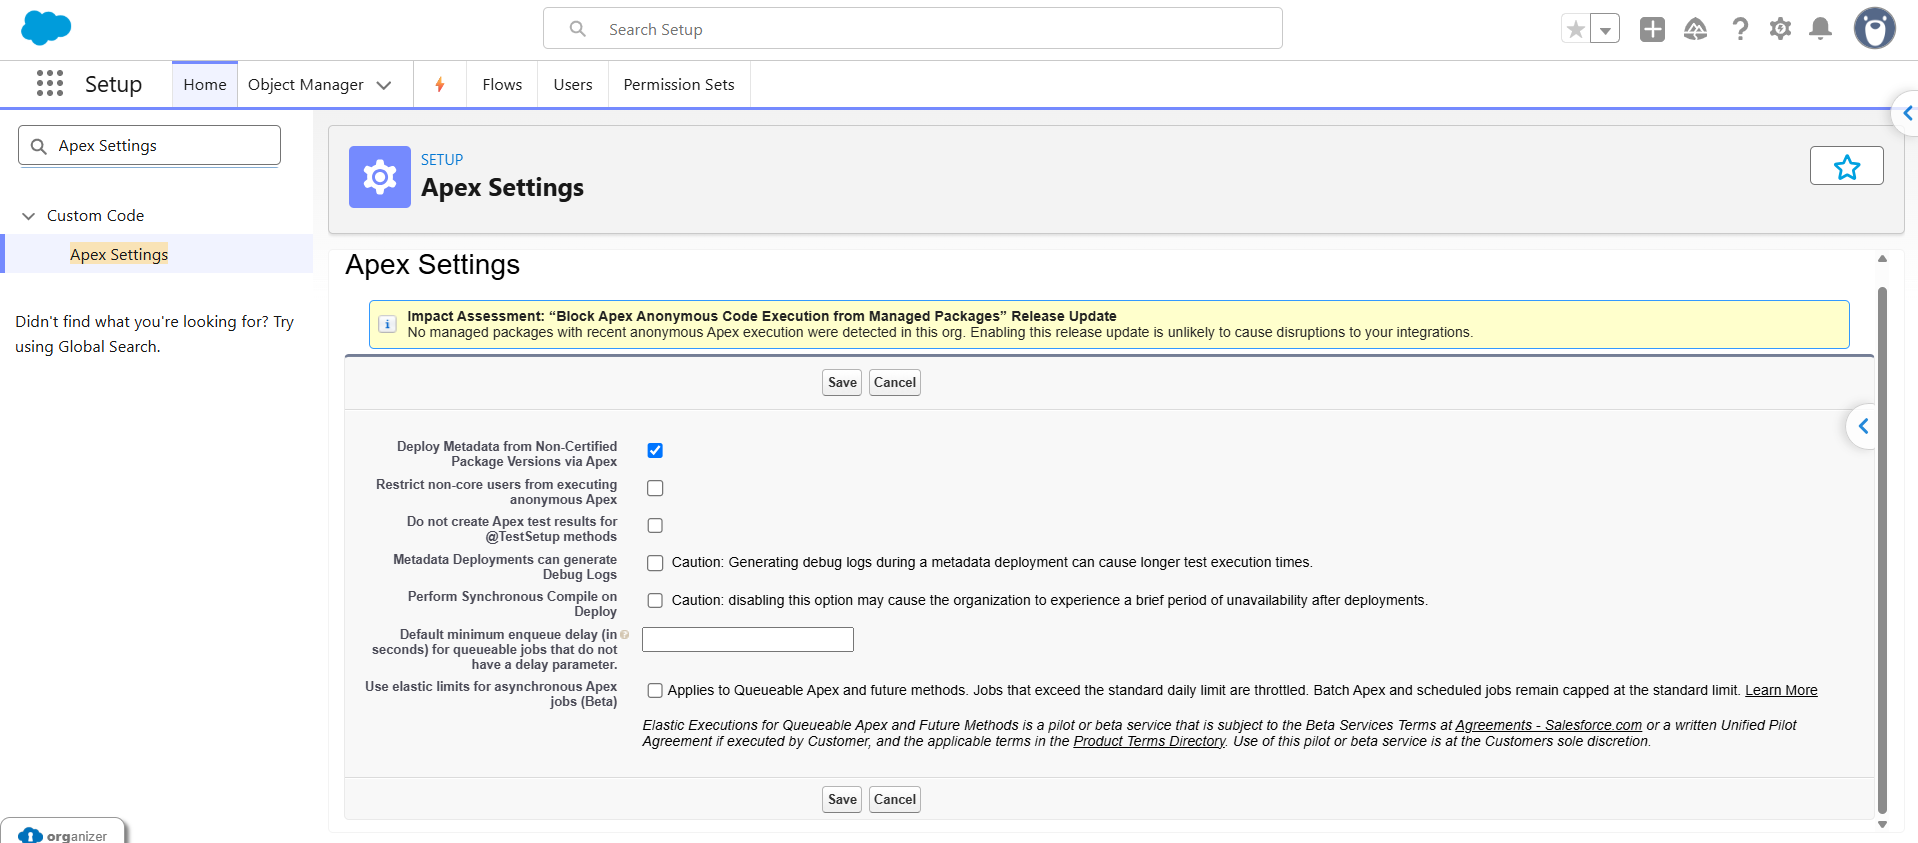
- Go to Salesforce Setup (gear icon).
- In the Quick Find box, search for and select Apex Settings.
- Check the Deploy Metadata from Non-Certified Package Versions via Apex checkbox.
- Click Save.
Step 6: Adjust or Disable Metrics Lifespan (Optional)
Developer sandboxes have limited data storage capacity, which is why it is recommended to reduce the number of generated metric records.
- Change Lifespan: To modify the metrics lifespan, please contact Forvendi representative.
- Disable Metrics: To completely disable the metrics functionality, follow these steps:
- Open the Breezz app from the App Launcher.
- Navigate to the Breezz Setup tab.
- Select the Metrics Setup option.
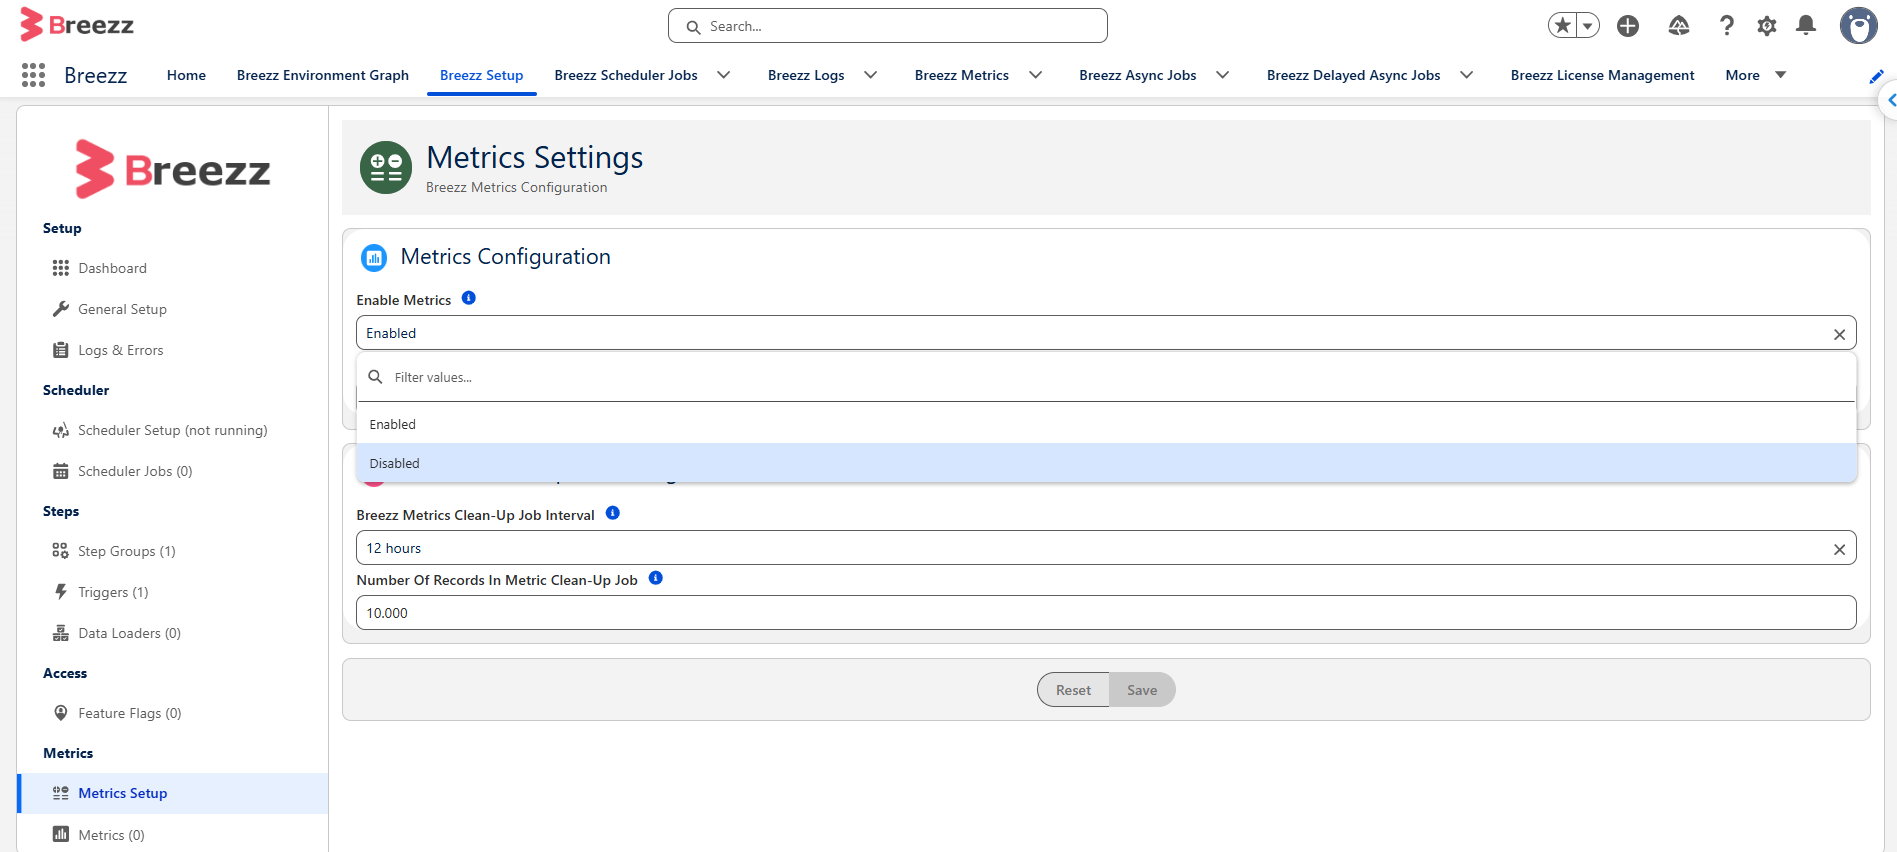
- In the Enable Metrics dropdown menu, select Disabled.