How to Run Scheduler
The Breezz framework allows you to schedule Step Groups to run automatically at defined intervals. The steps below describe how to configure your first Scheduled Job to execute a Step Group.
Step 1: Configure a Breezz Scheduler & Add a Step Group
In this example, we will configure a Scheduler to run the ToUpperCaseNameSteps Step Group every Saturday at midnight. It will process specific records defined by a SOQL Query (e.g., Accounts created in the last 7 days).
To define a scheduled job:
- Go to Breezz Setup → Dashboard.
- Click Schedule Job.
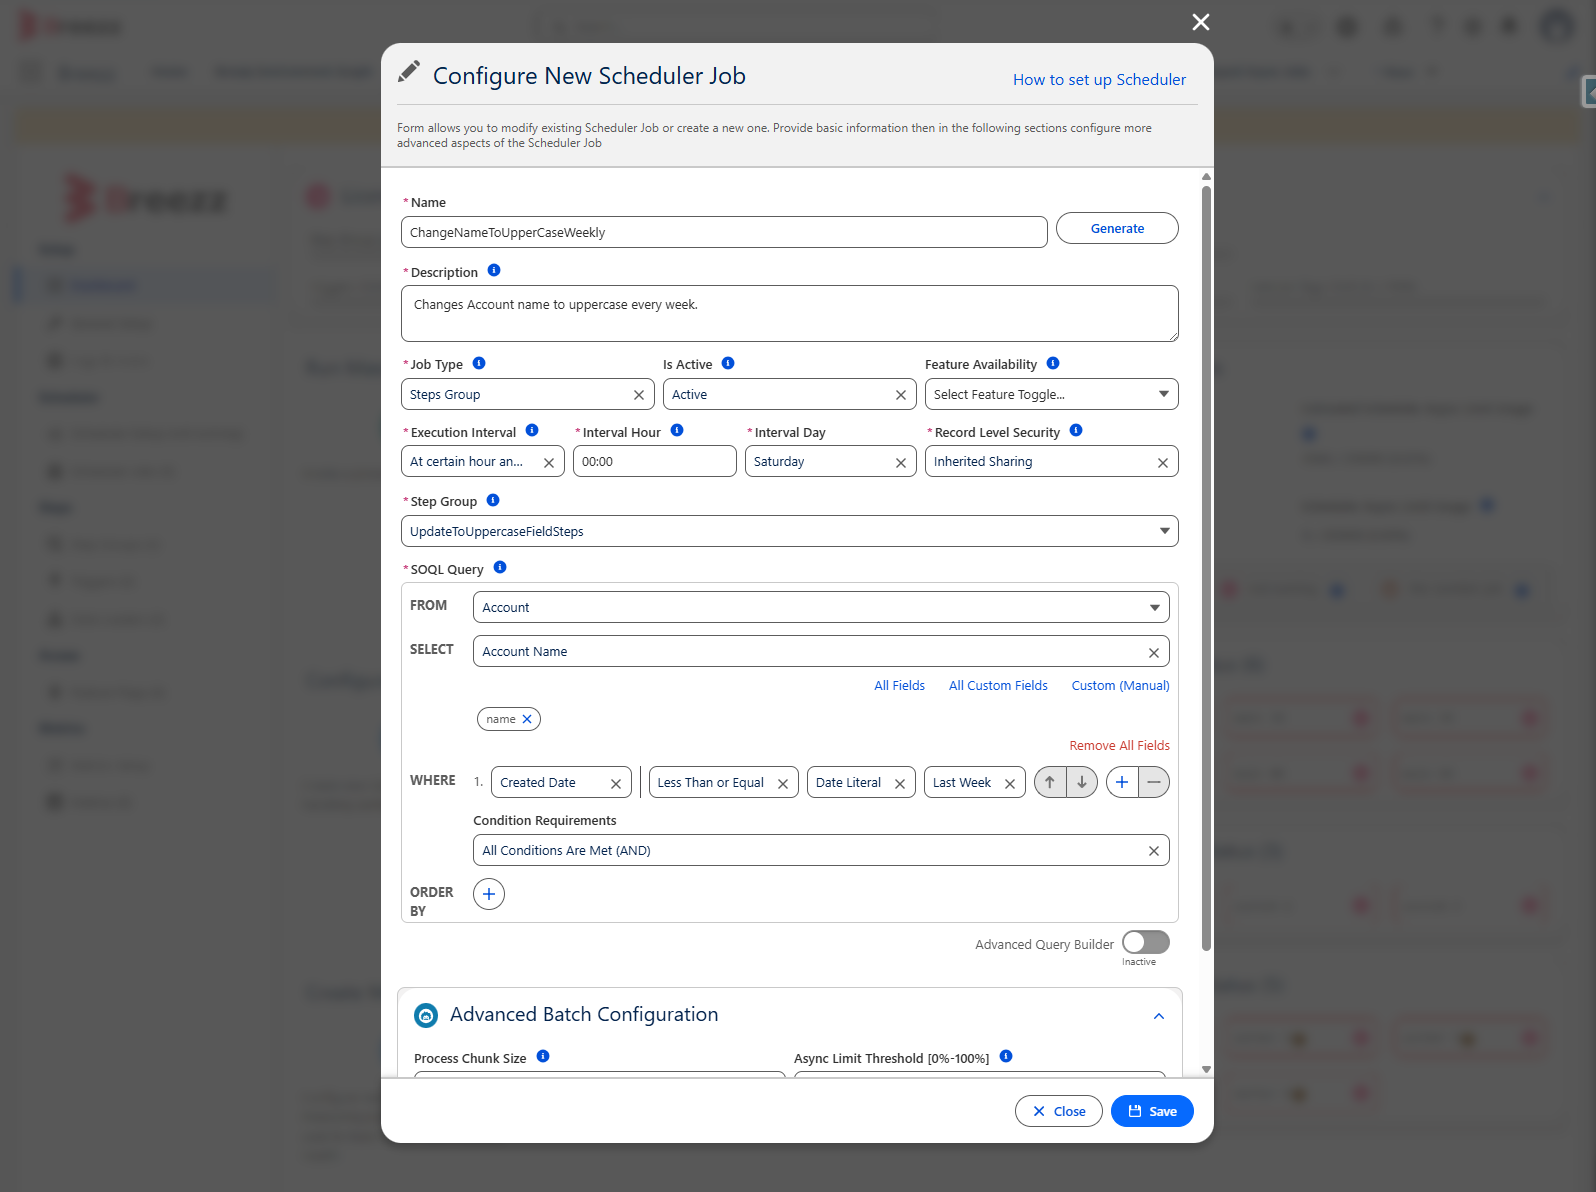
Fill out the configuration form with the following details:
- Name: Enter a clear name for your scheduler process (e.g., ChangeNameToUpperCaseWeekly).
- Description: Briefly describe the functionality of the scheduled job.
- Is Active and Feature Availability: Leave these at their default values for this example.
- Job Type: Choose Step Group. (Note: If you were executing a custom Apex class implementing the SchedulerJob interface, you would select Custom).
- Execution Interval: Define when the job should trigger. Select Saturday at 00:00 (runs every Saturday at midnight).
- Record Level Security: Determines the data access level for the Step Group. Select Inherited Sharing for this scenario.
- Step Group: Enter the exact API name of the Step Group you want to run.
- SOQL Query: Enter the query defining which records the Step Group should process. Ensure your query includes all the fields required by your Steps (an Advanced Builder can assist you here).
- Process Chunk Size: Specifies the batch size for Future, Queueable, or Batch jobs. Leave it at the default value of 200.
Step 2: Re-run the Scheduler
The Breezz Scheduler configuration updates automatically within a few minutes (it checks for changes every 10 minutes). However, to apply your new schedule immediately, you can manually restart the Scheduler.
Option 1: Restart via Apex
Navigate to Developer Console → Debug → Open Execute Anonymous Window and run the following commands sequentially:
Stop the current process:
forvendi.BreezzApi.SCHEDULER.kill();Start it again:
forvendi.BreezzApi.SCHEDULER.run();Option 2: Restart via UI
- Go to the Breezz App → Breezz Setup → Dashboard.
- Click Stop Scheduler manually, wait a moment, and then click Start Scheduler.
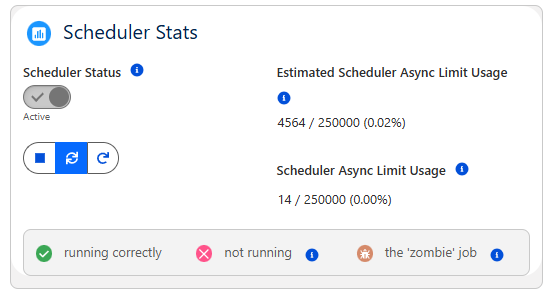
To verify that the Scheduler correctly initialized your new job, navigate to Breezz App → Scheduler Jobs → All and look for your Job Name (e.g., ChangeNameToUpperCaseWeekly) in the list.
Step 3: Update the Step Class to Save Changes
If you run the Scheduler using the basic Step class from earlier examples, you might notice that the Account Names do not actually change in the database. This happens because our initial Step merely modified the record in memory (sfRecord.put(...)) without performing a DML operation to save it.
Since Scheduled Jobs run asynchronously, we must use the Modification Context to instruct the framework to update the database.
Update your Step class to use addModificationToUpdate:
public with sharing class UppercaseNameFieldStep extends forvendi.Step {

    public UppercaseNameFieldStep() {
        // A public default constructor is required.
        // We pass the class name to ensure proper async execution and logging.
        super(UppercaseNameFieldStep.class.getName());
    }

    public override Boolean initRecordProcessing(Object record, Object optionalOldRecord) {
        SObject sfRecord = (SObject)record;
        String recordName = (String)sfRecord.get('Name');

        // Use ModificationContext to register the update safely without raw DML
        getContext().addModificationToUpdate(
             sfRecord.Id,
             Account.Name,
             String.isBlank(recordName) ? '' : recordName.trim().toUpperCase().replace('  ', '_')
        );

        // Return false as we have all the data needed to finish the process
        return false;
    }
}
Now, when the Scheduler runs, all Account records returned by your SOQL query will be successfully updated in the database.
💡 Apex API Reference: To learn more about how context operations work, review the ModificationContext API Documentation.