Trigger Configuration Example
This guide walks you through setting up a complete end-to-end Breezz execution flow: deploying a standard Apex trigger, writing a custom Step class, configuring a Step Group, and registering a Trigger Configuration in Breezz Setup.
Step 1: Create the Apex Trigger
First, generate or write the standard Apex trigger for your target SObject (Account). You can use the code generator in Salesforce under Breezz Setup → Triggers → Generate Trigger Code.
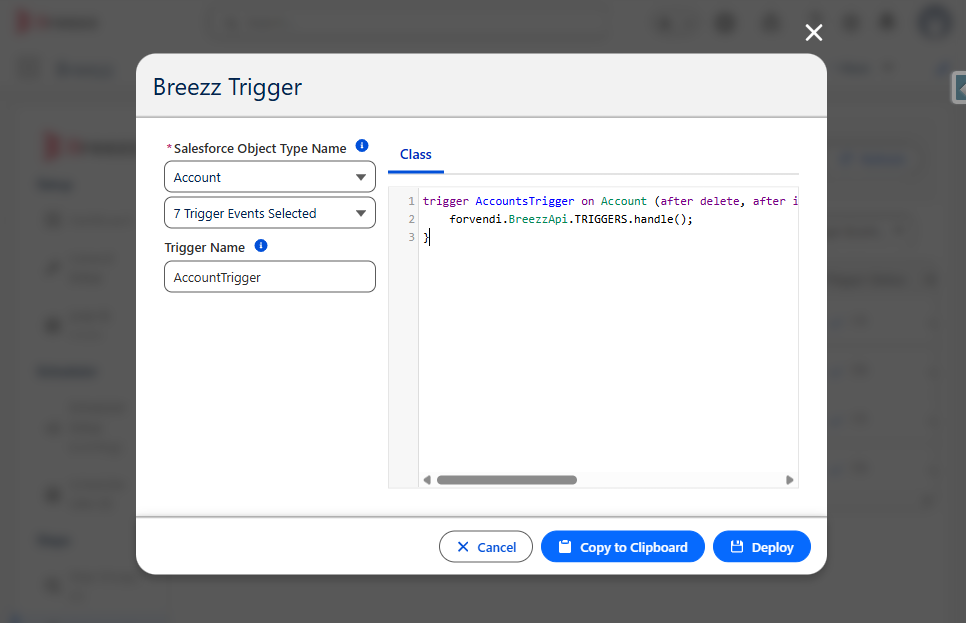
Select Account and the Before Insert event, then deploy the following Apex trigger code via your IDE or Developer Console (Setup → Developer Console → File → New → Apex Trigger):
trigger AccountsTrigger on Account (after delete, after insert, after undelete, after update, before delete, before insert, before update) {
    forvendi.BreezzApi.TRIGGERS.handle();
}
Step 2: Create the Step Class
Create an Apex Step class extending forvendi.Step to implement field formatting logic during the Before Insert pass:
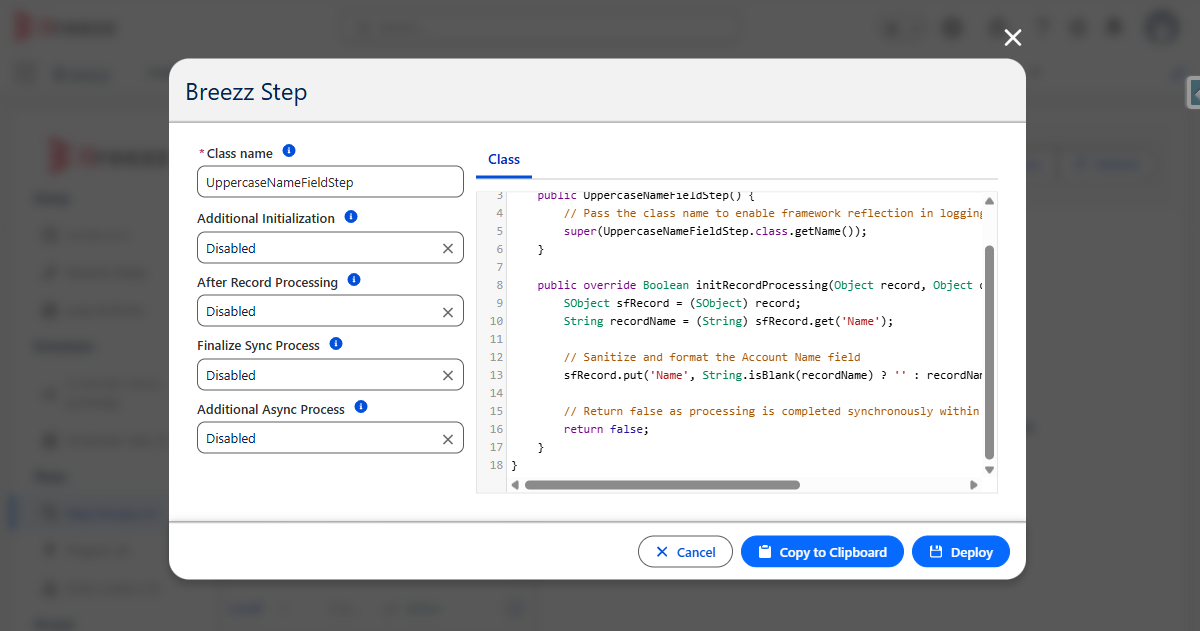
public with sharing class UppercaseNameFieldStep extends forvendi.Step {

    public UppercaseNameFieldStep() {
        // Pass the class name to enable framework reflection in logging and async execution
        super(UppercaseNameFieldStep.class.getName());
    }

    public override Boolean initRecordProcessing(Object record, Object optionalOldRecord) {
        SObject sfRecord = (SObject) record;
        String recordName = (String) sfRecord.get('Name');

        // Sanitize and format the Account Name field
        sfRecord.put('Name', String.isBlank(recordName) ? '' : recordName.trim().toUpperCase().replace(' ', '_'));

        // Return false as processing is completed synchronously within Trigger Context
        return false;
    }
}
Step 3: Create a Step Group
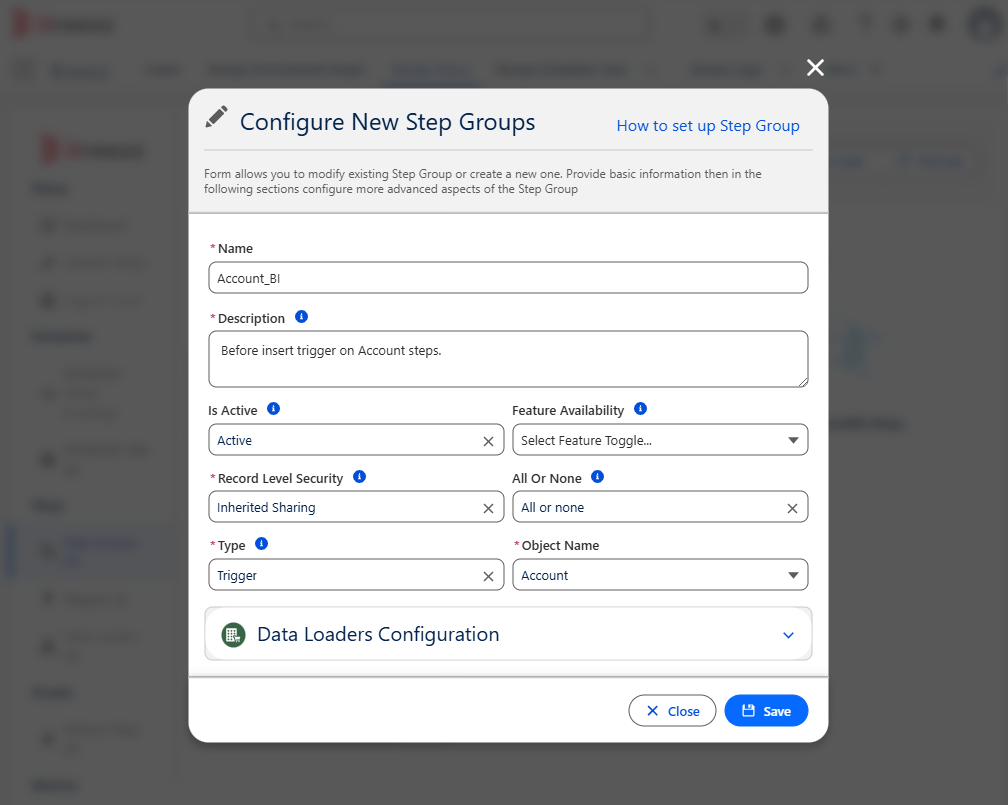
- Navigate to Breezz Setup → Dashboard → Create Group (or go to Step Groups → New).
- Enter a descriptive Name and Description (e.g., matching the target Trigger Configuration name).
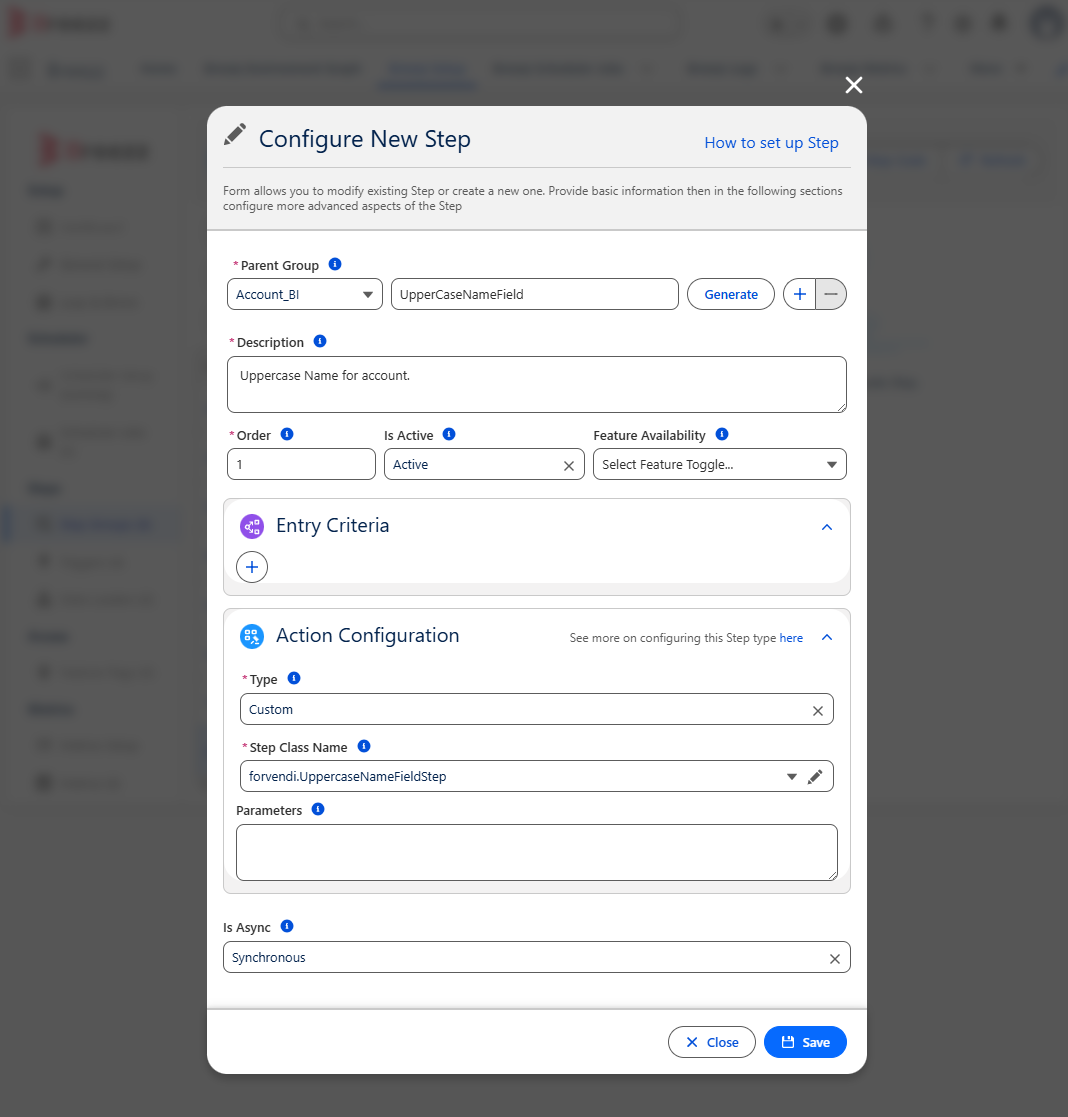
Step 4: Register the Step in the Step Group
- Open Breezz Setup → Step Groups → select your newly created group.
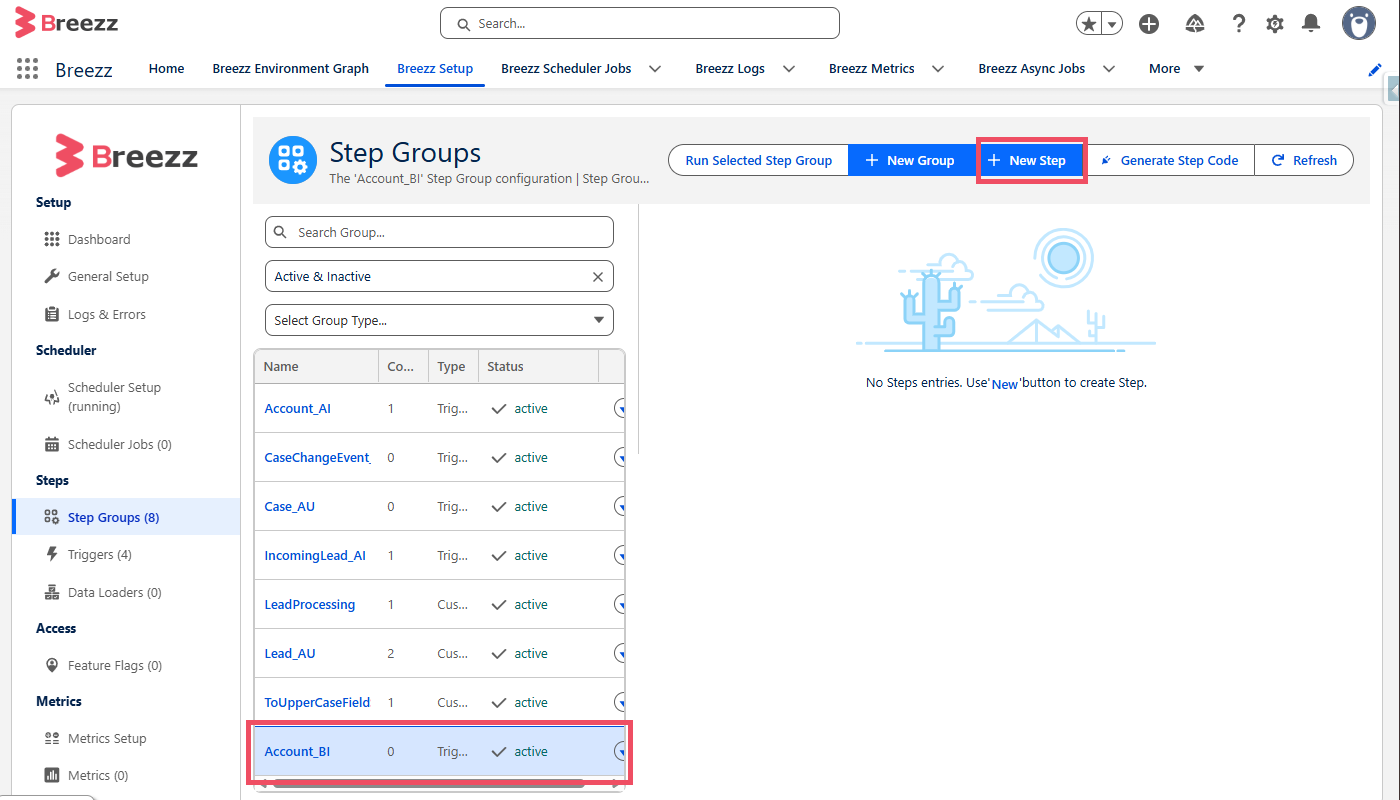
- Click New Step.
- Select
UppercaseNameFieldStepas the Step Class Name, set an execution Order, and save.
Step 5: Create the Trigger Configuration
Link your Step Group to the database trigger pass:
- Navigate to Breezz Setup → Triggers → New.
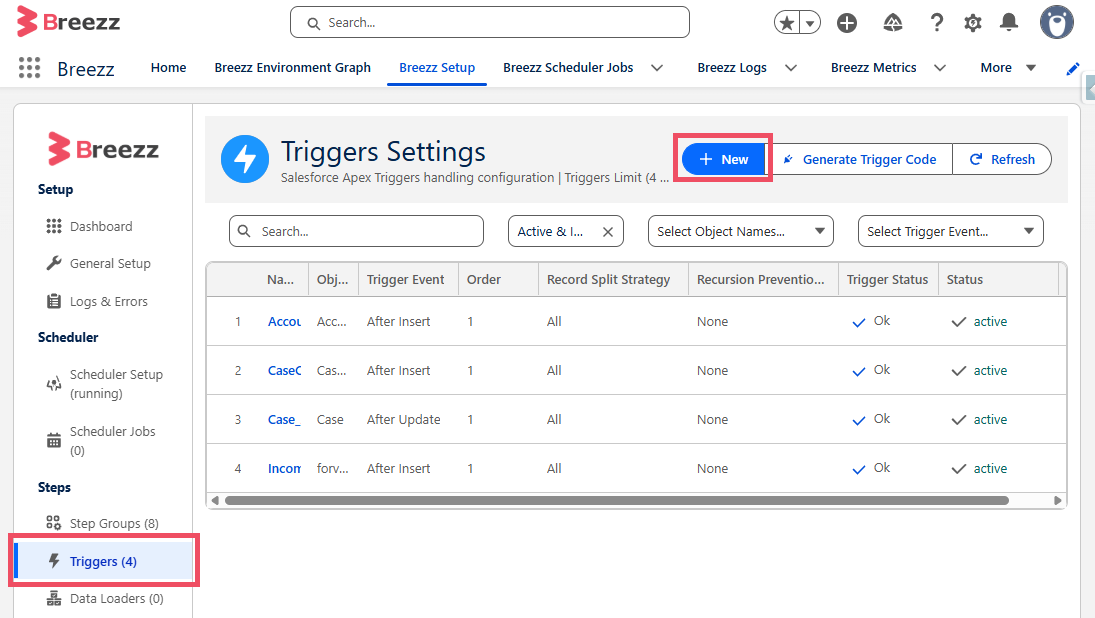
- Fill in the parameters:
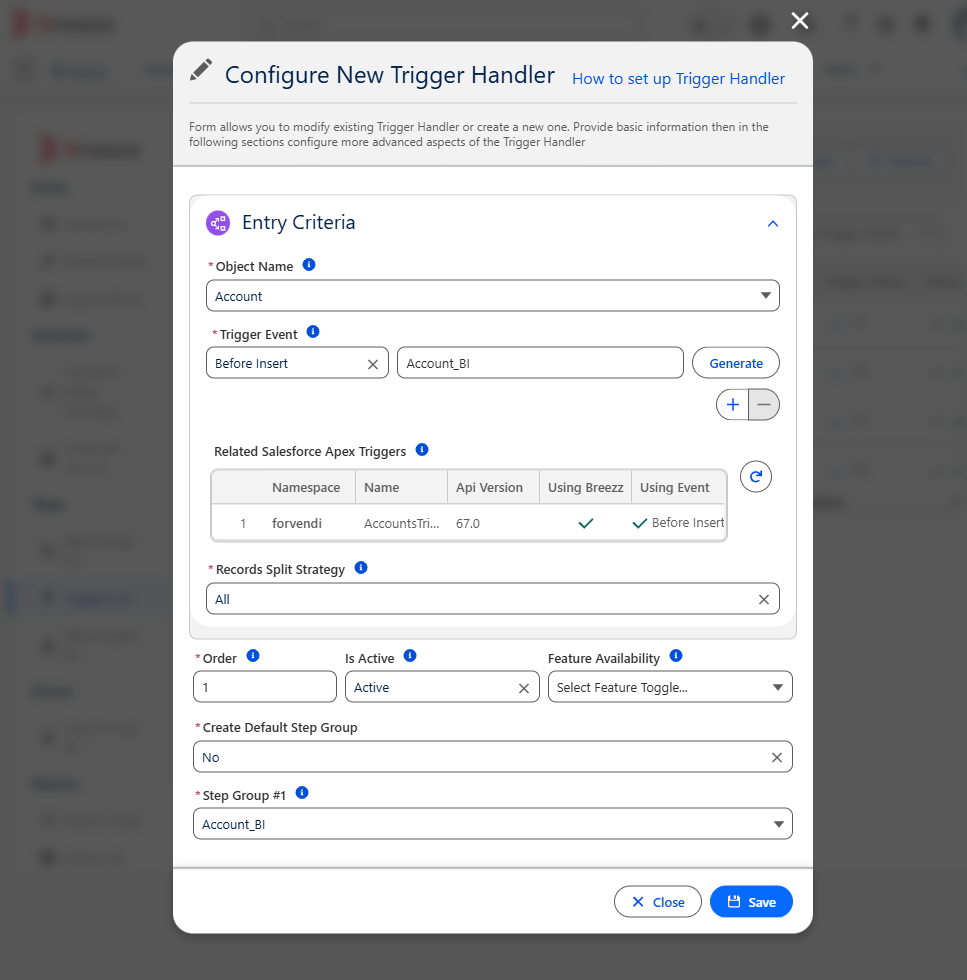
- Object Name:
Account - Trigger Event:
Before Insert - Name: Autogenerated combining object and event (e.g.,
Account_BI), or enter a custom name. - Create Default Step Group: Set to No.
- Step Group 1: Select the Step Group created in Step 3.
- Object Name:
💡 Best Practice: Keep logic consolidated within a single Step Group whenever possible. Executing across multiple groups creates isolated cache boundaries (
DataStore,ModificationContext) which can reduce performance.
Step 6: Test Trigger Execution
- In Salesforce, open App Launcher → Accounts → New.
- Input an Account Name (e.g.,
acme corporation) and click Save.
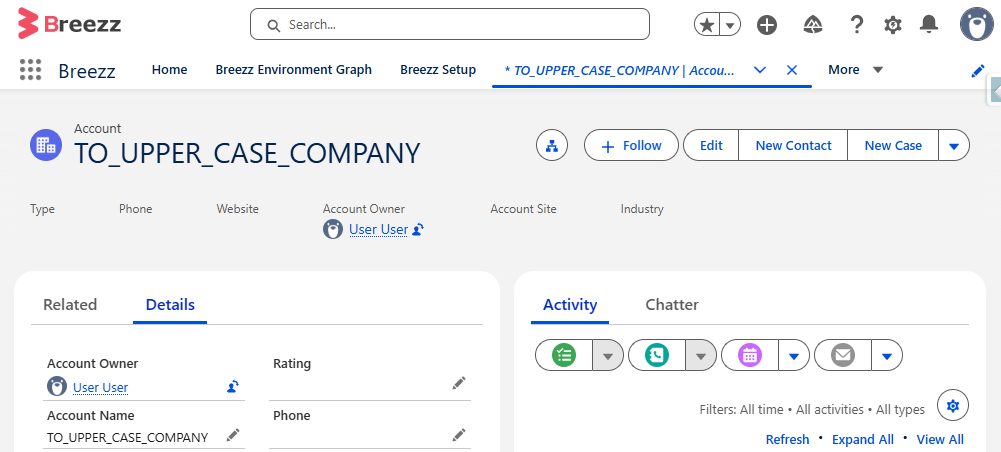
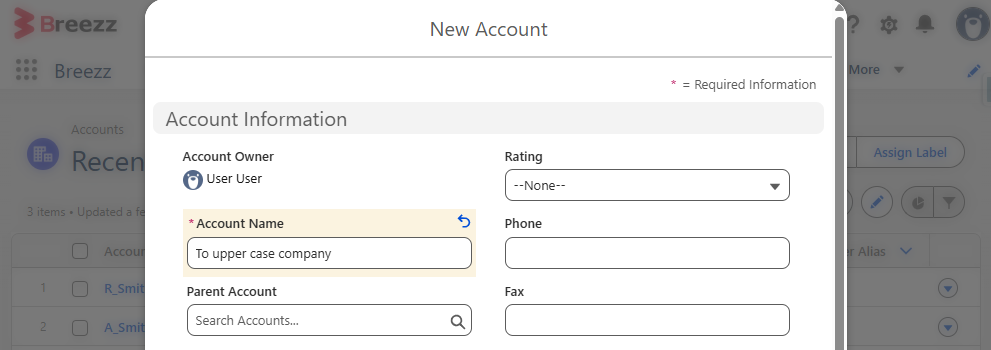 3. Verify that
 UppercaseNameFieldStep formatted the Account Name automatically upon saving:
💡 Related Topics:
- For details on field options and split strategies, visit Triggers.
- To write unit tests for this Step, check out How to Test Step.